Search This Blog

Tuesday, September 6, 2011

Lentil Salad with Walnuts and Yellow Beans


This was my first try at cooking lentils, and guess what? I really like them! The inspiration for this recipe was a colorful lentil salad with walnuts and herbs from the kitchn. I adjusted ingredients and amounts to what we had on hand, so feel free to do the same! I would definitely make this again, but I think I'd use bell peppers or carrots instead of yellow beans because I think they'd match the other flavors better. The yellow beans were still pretty good though. Another plus for this recipe is that it can easily be made vegetarian or vegan.


Lentil Salad with Walnuts and Yellow Beans
Serves 8

1 1/4 pounds lentils
5 cups chicken broth, vegetable broth or water
1 red onion
4 cloves garlic
1 pound green or yellow beans
1 cup chopped toasted walnuts
1/2 cup celery leaves
1/2 cup carrot greens
1/4 cup basil
1/4 cup flat leaf parsley
1 1/2 ounces Parmesan cheese (optional, but delicious!)
2 tablespoons molasses
2 tablespoons pomegranate red wine vinegar

Sort and rinse the lentils. Place them in a large stockpot with the chicken broth or water. Bring to a boil and then simmer for 20-30 minutes. Check to see if they're done by eating some lentils. They should be tender but not mushy. Our ended up a little mushy, but still tasted good. If you want the salad to be cool you can spread the lentils out on a baking sheet. If you're fine with warm lentils, you can just take them off the heat.

Dice the onion and the beans. Mince the garlic. Chop up the greens and herbs. Heat some olive oil in a skillet and saute the onions and beans for 4-6 minutes. Then add the garlic, greens and herbs. Saute until fragrant, about one minute more. Stir in the molasses and vinegar and cook for about another minute.

Combine the vegetables and lentils. Sprinkle Parmesan on top and enjoy!

Strawberry Freezer Jam


We made strawberry freezer jam for the first time earlier this summer. I never realized it was so easy! Here it is: mash fruit, combine with sugar and pectin, stir, let stand, freeze. So easy right! Just FYI, don't be tempted to use your food processor or blender to make the process go quicker. You'll end up with strawberry syrup instead. That's what I did the first time. I learned my lesson and this time we used a potato masher as directed. It wasn't too bad. We used 10 pounds of strawberries and that made 18 cups of jam. It took us about 2-3 hours, mostly in hulling. If you only do a couple pounds you could get it done in an hour. Here's the process, photo style: (recipe at the bottom)

Hull the strawberries with a paring knife. Hold the knife at an angle like below and turn either it or the strawberry. 

Tada! FYI, this is the longest step, so have some good music going.

Mash your strawberries with a potato masher. Measure them out so that you know how much pectin and sugar to add. Kyle came up with the genius idea of mashing them in a giant measuring cup. I love that guy!


Calculate how much pectin and sugar you need (from the recipe below) and stir. Then spoon into containers.


After those have set for half an hour, let them take over your freezer like so:


Enjoy with fresh-baked brioche! Post to come :) P.S. I'll probably cheat and use this picture for that post too. I hope you're okay with that. 


Strawberry Freezer Jam
source: Ball Instant Pectin container

For every 2 cups of jam you'll need:
12/3 cups mashed strawberries (we got about 11/3 cup per pound)
2/3 cups sugar or splenda
2 tablespoons Ball Instant Pectin

Don't exceed 6 jars per batch or it might not set. That's about 3 1/3 pound per batch.

1. Hull, mash and measure strawberries

2. Stir required amount of pectin and sugar in a bowl.

3. Stir into strawberries for 3 minutes

4. Ladle into clean freezer containers leaving 1/2 inch headspace. Let stand for 30 minutes.

5. Freeze or enjoy!


Monday, September 5, 2011

Roasted Tomato Soup with Herbed Croutons


If you want to see a prettier picture of this recipe, head on over to Letie's Culinaria where I got the recipe from.  While you're there, check out all their other great recipes and hilarious commentaries on each one. I think my favorite is their commentary here about the annual tomato slinging fest in Spain. "Gosh, we hope they're not using heirlooms."


This is hands down my favorite tomato soup I've ever had. Kyle wholeheartedly agrees! It gets it's lovely deep flavor from the tomatoes' stint in the oven. It's not only delicious, but also pretty easy. The hardest part for us was sourcing all the fresh herbs. Luckily, there was a sweet old lady with an herb cart at the farmers market the day we first made it. I highly recommend trying to find as many of the herbs fresh as you can, but it's definitely worth making even if you can't. 

We loved it so much that we made it twice in one week! The first time we used a yellow onion instead of red because we thought it would give more flavor. Unfortunately, it was a little overpowering. The soup was still good, but not perfect. The second time we used half a big red onion and it was so much better! I'd call this tomato soup perfection. 


The croutons are definitely worth trying. And don't bother cutting the crust off your bread, not worth it. I honestly don't think I'll ever buy croutons again because they're so easy!

P.S. 3 minutes in your oven could be the difference between this:


and this:

The first picture is from our second try at the soup. We learned our attentiveness lesson the first time. So check your croutons. Or have a less ghetto oven than us with a window. That would help too.

Easy Heirloom Tomato Sauce


I intended to do an uncooked tomato sauce with these beautiful heirlooms, but unfortunately they were a little mushy by the time we got to them. With an outstanding flavor though, I knew they didn't need much extra to shine in a cooked tomato sauce.


Aren't they gorgeous! I chopped them up and cooked them with some basil. A splash of extra virgin olive oil at the end was all it needed! I wish it was this easy to have wonderful pasta sauce all year round.


Easy Heirloom Tomato Sauce

6 heirloom tomatoes, any variety
1/4 cup fresh basil
salt to taste
2-4 tablespoons extra virgin olive oil

Dice the tomatoes and cut the basil into long thin strips. If your tomatoes are fresh, you can skip cooking and enjoy with the olive oil on pasta, rice or your choice of grain right away! If they're a little past ripe, cook the tomatoes, basil, and salt in a small saucepan on the stovetop until they have reduced to your desired consistency. Add the olive oil and enjoy!


Chocolate Zucchini Cake


Our nice neighbors gave us some awesome zucchini from their garden. We ate some of them as a meal, but with the rest, we decided to make two of these beautiful looking chocolate zucchini cakes from Zoe Bakes. I love her blog! She's a pastry chef, mom, and co-author of the Artisan Bread in Five Minutes a Day series. She always had delicious-looking desserts on her blog. I've enjoyed every one of the recipes I've made from there.

Our zucchini cake didn't look as pretty, but I'm sure it tasted as good, because it was amazing! We gave the prettier one to our neighbors to thank them for the zucchini. I asked my mom first if it would be some kind of taboo re-gifting, but she said she'd appreciate it, so we dropped it off. Unfortunately they didn't come to the door, so we had to leave it with a note instead. We checked later and it was gone, but either someone else stole it or they didn't get out note because we haven't heard back from them, but we hope they liked it!


We definitely liked it! So make this moist and chocolate-y cake for yourselves! And if you give it to your neighbors make sure you're there in person. I was debating saying in the note we left that it was made with their zucchini because if you didn't know, you really wouldn't be able to tell. The only trace the zucchini leaves is some extra body and moistness. Maybe I shouldn't have mentioned it... Another bonus if you make it just for yourself is that you can do it in a 9x13 and not worry about the bundt because it doesn't have to be pretty, just delicious!


What do you think about giving someone a baked good out of stuff from their garden? Bad? Good? Would you eat this cake if I gave it to you?

Recipe Redo: Summer Squash and Tomato Gratin


We revisited this recipe recently, but doubled it. Unfortunately it was a little soggy. I looked back at the inspirational recipes and realized that the one which included milk also had potatoes. I think we must not have added the full amount of milk on the first one because it was crisp. Either way, I'd recommend leaving out the milk for this one. Here's the revised recipe:

Summer Squash and Tomato Gratin
serves 4
Prep: 15 min
Cook: 35 min

2-3 squash/ zucchini
6 oz mozarella (we used part-skim, but whatever you have works)
1-2 tomatoes
1/4 cup breadcrumbs (crushed croutons could substitute)
1 tablespoon dried basil
2 teaspoons dried thyme
salt and pepper
2 tablespoons + olive oil


Wash and slice the squash and zucchini into thin coins.
Spread some olive oil in a 9" square pan
Toss the sliced squash and zucchini with 2 tablespoons of olive oil.
Layer a third of the squash and zucchini on the bottom and sprinkle salt and pepper over them.
Spread about 2 ounces mozarella on top.
Repeat the squash (+salt and pepper) and mozarella layers and top it off with a final squash layer with more salt and pepper.
Sprinkle on about a tablespoon dried basil.
Slice the tomatoes and layer them on top.
Sprinkle it with about 2 teaspoons dried thyme and some more cheese.
Bake it in the oven at 400 for 30 minutes uncovered, or until the tomatoes start browning and crisping on the edges.
Sprinkle breadcrumbs on top and let it bake for 5 more minutes.
Enjoy before Fall comes!

Margherita Pizza

For our anniversary Kyle got me a pizza stone! It was pretty much the best gift ever. To celebrate, we made Margherita Pizza three times in one week!


Here's a look at the first one, pictured below. For the crust, we used our favorite bread dough from Artisan Bread in Five Minutes a Day. I love the bread it makes, but I like the pizza even more! You can find instructions for the bread dough here, and instructions for baking it as pizza dough here. It takes a little bit of advance planning (at least 2 hours) if you don't already have dough in your fridge, but it's really easy. When making pizza instead of bread, you don't have to do the pre-baking resting, so if you just keep some of the dough in the fridge all the time (which we try to do) you can make pizza on a whim! We topped this pizza with sliced tomatoes, dried basil and mozzarella.  It was pretty good, but all the water from the tomatoes made the center of the crust soggy. 


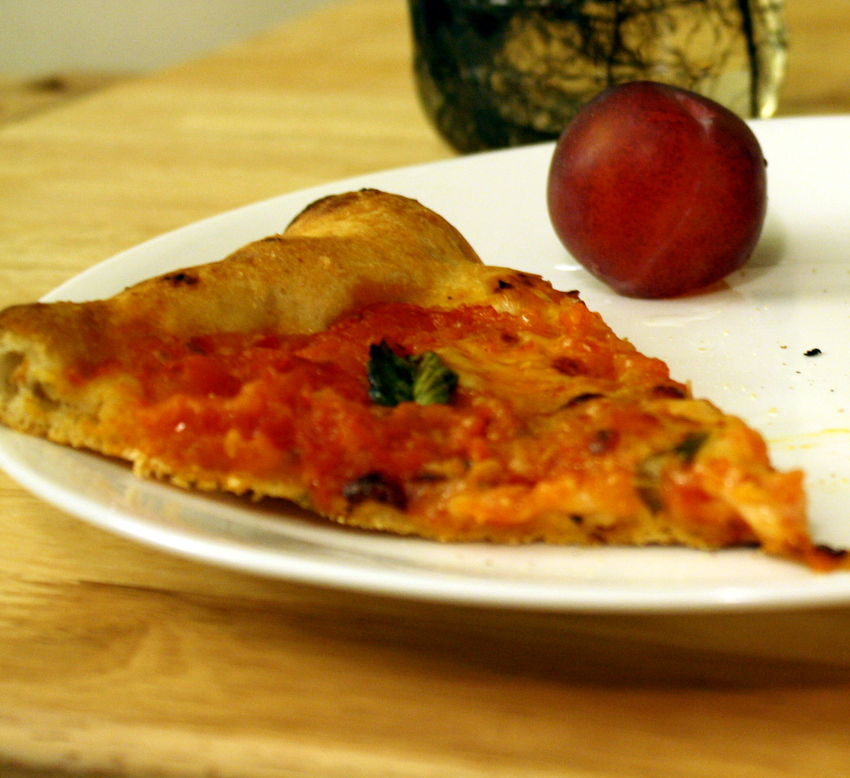
We solved the problem with the next one. Same crust, but this time we used this sauce recipe from epicurious, but we subbed in fresh tomatoes. And we also had some awesome fresh mozzarella and basil. Wow. This picture really doesn't do it justice. I really need to work on my photography skills. (And also make food while the sun is still up.) It had perfectly crisp crust! This was the best pizza I've had this year, and last (except maybe Zachary's in Berkeley). Please make it, you'll be really happy you did!

We made pizza a third time for my dad and my sister Anne as they were coming through to take her to college. That time we used both the crust and sauce from the epicurious recipe. I didn't love the crust as much, but it was easier to throw together last minute (more like last hour, but hey). Also, we leaned that if you drop about a slice worth of crust and sauce onto the bottom of you oven, this happens:


Yep, that is sun streaming through the smoke that filled all of our apartment, including our bedroom where this was taken. We ordered a pizza peel that day to avoid that in the future.  

If you're using a cookie sheet instead of a pizza stone you won't have this problem since you put the pizza on the sheet before you put it into the oven. So don't worry.

I hope you get a chance to make some awesome pizza! What are your favorite pizza toppings? You can probably guess my current favorites. (Hint: look at the post title)